You cannot edit your own User Permissions. You cannot edit an Admin's permissions from a sub LearnCenter if that Admin is a Co-owner in a parent LearnCenter.
LearnCenter User Permissions are the keys to the LearnCenter. As an Admin, you have the authority to grant or deny User Permissions for other users. When you grant a user a permission, you are giving that user the right to access functionality, fields, or pages to which other users may not have access. Denying a permission takes away that user’s right to access that information. Some fields and functionality are tied to User Permissions, and if a user does not have those permissions that user will not be able to access that field or functionality.
|
|
You cannot edit your own User Permissions. You cannot edit an Admin's permissions from a sub LearnCenter if that Admin is a Co-owner in a parent LearnCenter. |
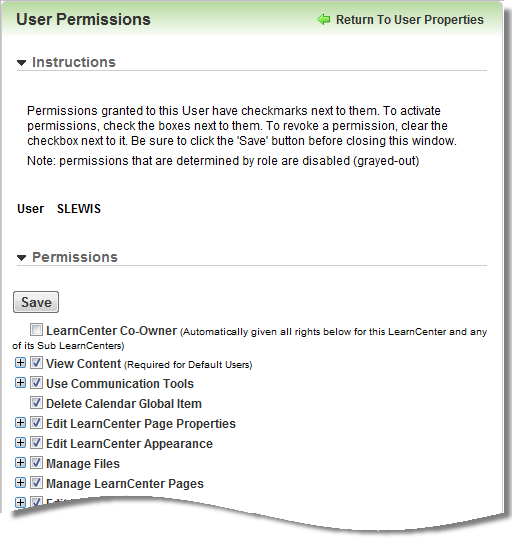
The User Permissions page lists all permissions. Click  next to each User Permission to expand the menu and display more User Permissions below that top-level parent. When you select a top-level User Permission, all its sub permissions are also selected. Expand the top-level permission to display the sub permissions and then click or clear their check boxes individually to suit the permissions requirements for a user.

There are two methods for granting User Permissions:
|
|
See User Roles and Associating User Permissions to a Role for additional information. |
|
|
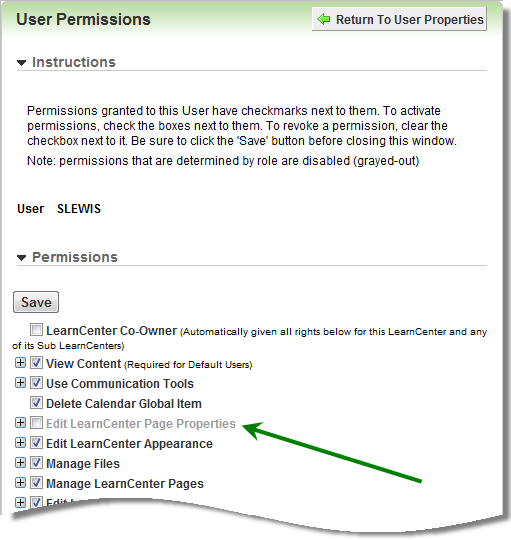
In some cases, you may find it easier to manage User Permissions by assigning users to a role then granting certain additional User Permissions as needed for the user. If a user has a permission that is defined by a role, the check boxes next to those permissions will be disabled when you try to access their granular permissions. |
The default permissions granted to new Users who are defined by the role called “User.” This role contains the following two permissions, but you can edit it to include more or fewer permissions:
Without these two permissions, users will not be able to see content on LearnCenter pages or use the Com System.
|
|
If you are creating an Admin, you must also grant the View Management Links permission (sub permission of Manage Options), because it is required for full access to the options secured by most of the other User Permissions. |
If you click the LearnCenter Co-Owner check box, you give a User permission to access all Admin areas and functionality associated with this LearnCenter and any sub LearnCenters. When you grant this permission, all User Permission check boxes are automatically selected for this User.
|
|
This is the only permission that can be inherited to sub LearnCenters. |
The following LearnCenter features require Co-Owner permissions:
To deny Co-Owner privileges, clear the check box next to LearnCenter Co-Owner.
To access the User Permissions window, follow these steps. On the ControlPanel:
 on the Users
menu to expand it.
 in the Actions
column next to a user. The User Permissions window opens.
in the Actions
column next to a user. The User Permissions window opens.You can grant or deny User Permissions as needed. You can grant whole categories or just individual sub User Permissions within a category. If you click a check box next to a top-level User Permission category, all sub User Permissions are also automatically granted. If you clear a check box next to a top-level User Permission category, all sub User Permissions are also automatically denied.
If some but not all of the sub User Permissions are selected, the parent permission’s color changes to a lighter color.

Each permission category and individual sub permission is described in full in their respective topics.

Copyright © 2010-2015, Oracle and/or its affiliates. All rights reserved.