You are here: External Training > Adding New External Training Events

Add New External Training Events

You can add new external training events using the new External Training menu on the ControlPanel. Once added, you can map credits, categories and Users to them.

External Training items can only be added manually using these instructions. You cannot use Bulk Loader to insert or update External Training items, including External Training ILT Sessions.

On the ControlPanel:

  1. Click on the External Training menu to expand it.
  2. Click External Training.
  3. Click to expand the Filters section and search for the external training events you want.

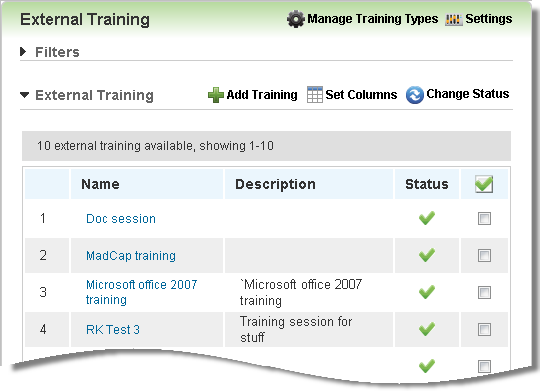
All of the events you or other Administrators have added are listed here.

  1. Click Add Training.
  2. Type a Name for the training event.
  3. Type a Description for the training event.
  4. Select a Category for the training event. (Recommended to make searching for training events easier in the future .)
  5. Select a Start Date and End Date for the training event. You may choose to leave these fields blank so that Users can enter the information later.
  6. Select a Training Type. The selections in the list are the training types you created in the root LearnCenter.
  7. Type the Instructor name. You may choose to leave this field blank so that Users can enter the information later.
  8. Type the Location name. You may choose to leave this field blank so that Users can enter the information later.
  9. Select the Expiration date if this external training must be repeated at certain intervals.
  10. Select one of the following for Status:
  1. Complete any custom fields you may have added for external training.
  2. Click Save. Additional fields become available, enabling you to optionally map credits and Users to this event.
  3. Click Select Credits and map the appropriate credits to the external training event.
  4. Click Select Users and map the appropriate Users to the external training event. When you map Users here , they are automatically approved.
  5. Click Save.

Related Topics IconRelated Topics


Copyright © 2010-2018, Oracle and/or its affiliates. All rights reserved.