 on the LearnCenter Design
menu to expand it.
on the LearnCenter Design
menu to expand it.This Widget provides Supervisors with visibility into their subordinates' Learning Plan and Transcript activities, and their progress. The Team Monitor Widget leverages data from existing Learning Plan and Transcript Widgets, and rolls up metrics from them to create Team Monitor views. The Team Monitor Widget contains a dashboard that lists counts for team members for selected status-based metrics. Supervisors can see each team member's dashboard metrics, and can use the metrics to drill down to the subordinate's Learning Plan or Transcript Widgets. Features of the Team Monitor Widget include:
To add a custom Learning Plan Widget, do the following. On the Control Panel:
on the LearnCenter Design
menu to expand it.
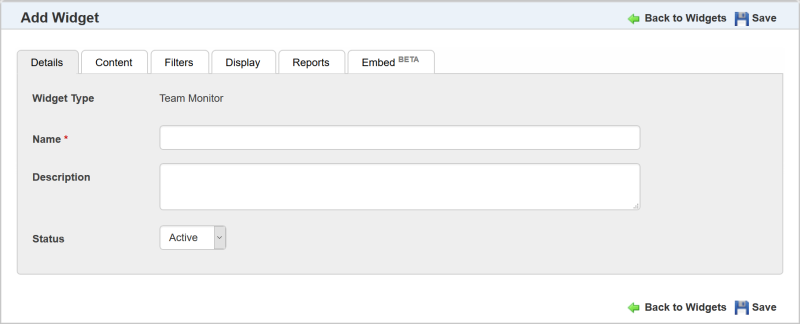

Use this tab to add and customize the “views” that will display to Supervisors on the Widget. A view is a chunk of information based on either the Learning Plan or Transcript Widget, along with your selection of mini dashboard items and filters.
When you select a Widget Type, the Widget drop-down list and the Mini Dashboard options become available. The Widget drop-down list contains all available Widgets of the selected type.

|
Note: You can have up to 6 views total. You may want to have multiple Learning Plan views or Transcript views using different filters for each. |
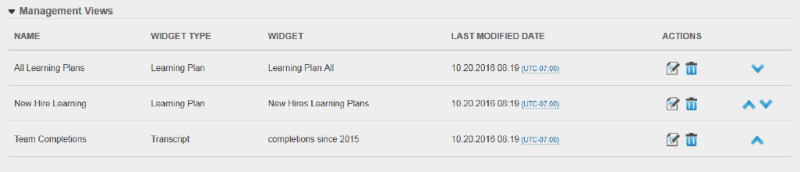
You can then add other views if you want. Notice that you can edit or delete views by clicking  and
and  . Notice also that you can use the
  and
and  icons to rearrange the save Management Views. The order you select here is what the order that will display to end Users.
The Last Modified Date column lists the most recent update to any of the Management Views. The modified date/time is not by individual Management View, but is based on the most recent add/update to any of the available Management Views.
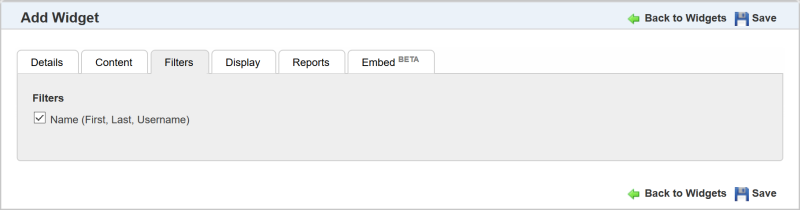
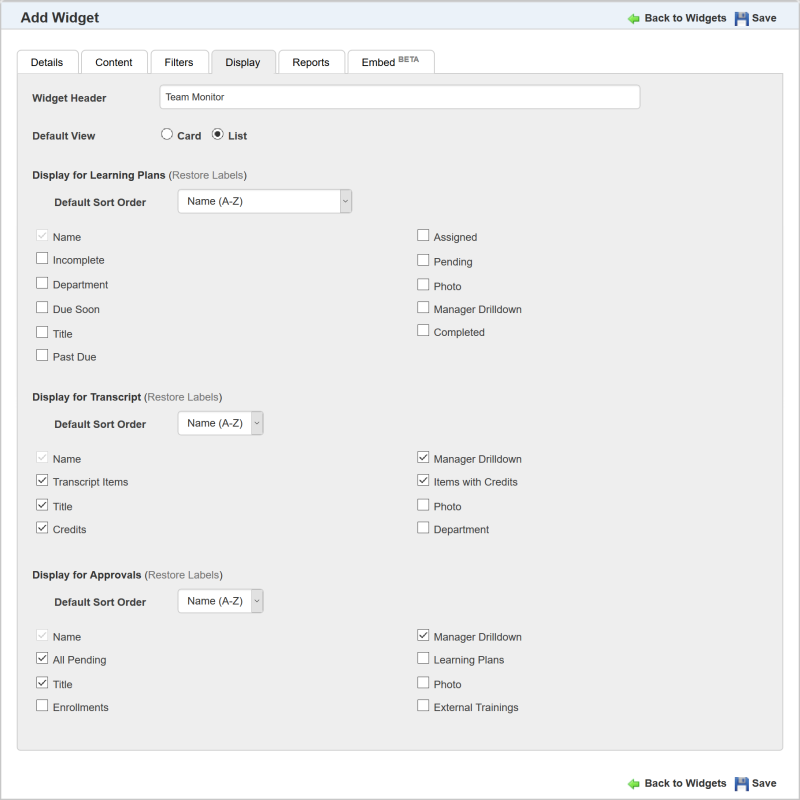
Use this tab to indicate what items should display to end Users.
 icon to open an editable field and type the text you want to display for the field. You can restore labels to their default settings by clicking Restore Labels.
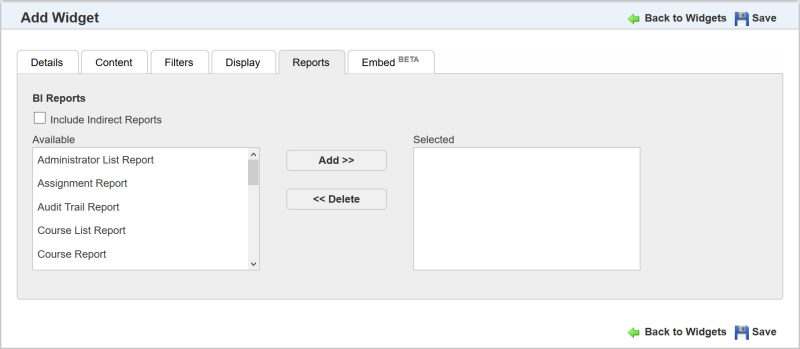
Use the Reports tab to expose some BI Reporting reports to Supervisors and Managers via the Team Monitor Widget. You can make any of the following reports available:

|
The Embed tab is also available. This Embed tab enables you to embed supported Widgets on external SSO-enabled websites by placing a snippet of code on the hosting page. See Widget Portability - BETAfor detailed information. |
The following illustrations are examples of what the Team Monitor Widget can look like to end Users based on different selections during Widget setup.
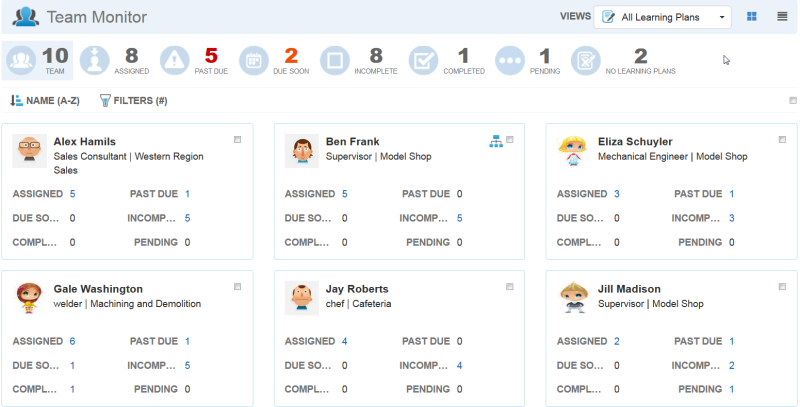
In the example above, the Widget opens in Card view layout, and uses the All Learning Plans view. Notice the mini dashboard at the top of the page containing counts for various items. There are 10 people on this Supervisor’s Team. Eight members have Assigned items. Five members have Past Due items, and so on. Clicking any item in the dashboard refines the results to display just those team members who are associated with those counts. Clicking Team returns all team members to the page.
For example, clicking Due Soon causes only those Users with items that are due soon to display.

Each User’s associated items display counts that are clickable.
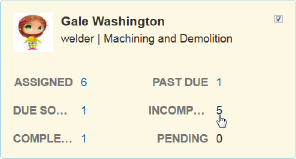
You can drill down on any of the information listed for a User by clicking the counts.
You can select members of the team by clicking the check box by their names.
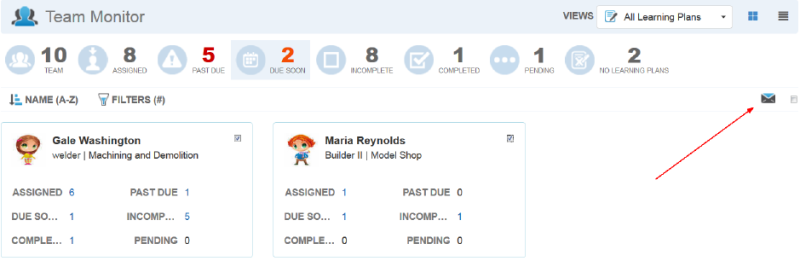
You can email selected Users by clicking ![]() to open the Email Selected Team Members window.
to open the Email Selected Team Members window.
|
|
Note: Selecting the “select all” check box at the top of the page (next to the |
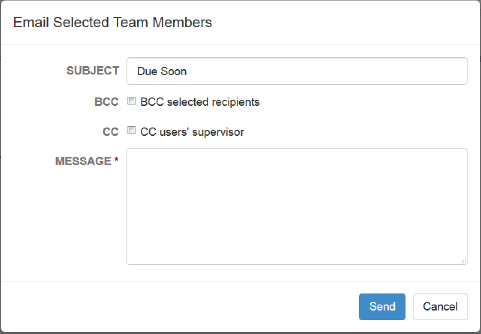
Update the Subject, or use the default text. Select BCC if you only want recipients to see their own name in the email recipient list. Select CC to send a carbon copy to the users’ supervisors.

|
Tip: Selecting CC is a good option if you are sending messages to indirect reports and you want to let their supervisors know you are emailing them. |
Type the Message and click Send.
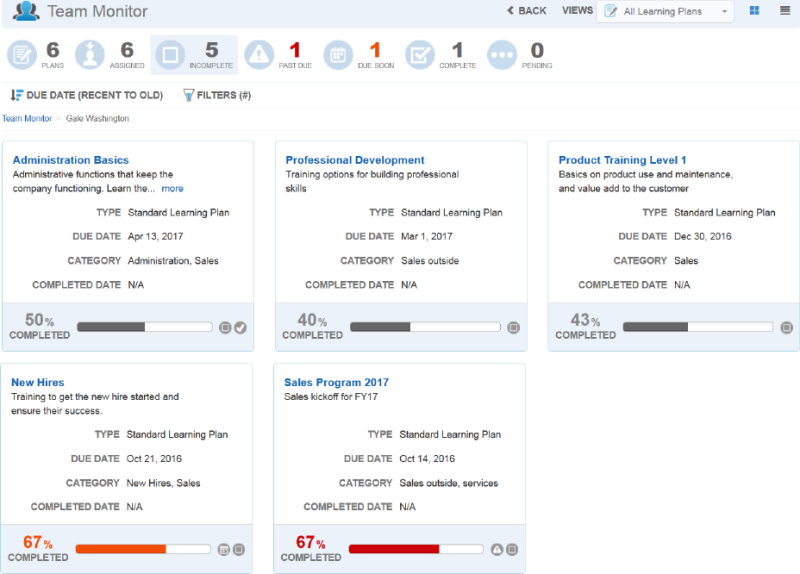
If you have Users who supervise others, a special icon appears next to their name.
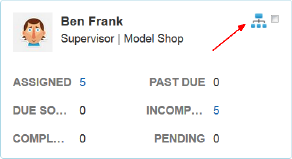
Click this icon to see their subordinates.
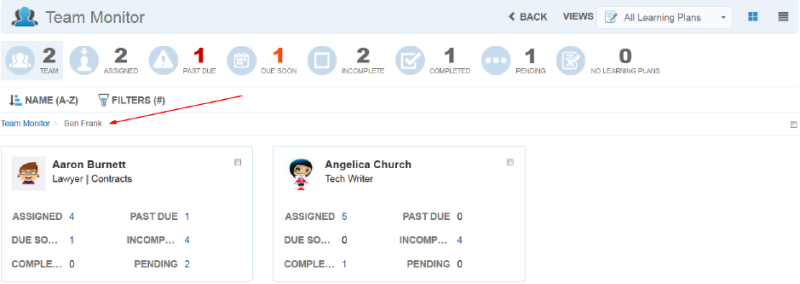
Notice in the breadcrumbs you can see which User you clicked on to view the subordinates. The illustration above shows that User’s Team Monitor page. You can drill down on that Supervisor’s subordinates’ information by clicking the counts associated with them. You can also send email messages to them, and send carbon copies to their Supervisor.
If you created multiple views for the Widget, Supervisors can switch between Views from the Views drop-down list at the top of the page.

Selecting a View displays the Widget using the settings you included on the Content tab for that view during the Widget setup.

The example above displays results for the selected view called Team Completions, which displays Transcript information to the Supervisor. The Supervisor can drill down to details by clicking the counts associated with each User.
![]()
When you drill down on a User’s Transcript, you have the ability to export the Transcript information.
Another view is the Approve Pending view, which is available on the Widget if you selected Approval on the Content tab during the Widget setup. This view provides Supervisors and Managers with a list of Team Members who have pending Learning Plans, Enrollments, and External Training events.
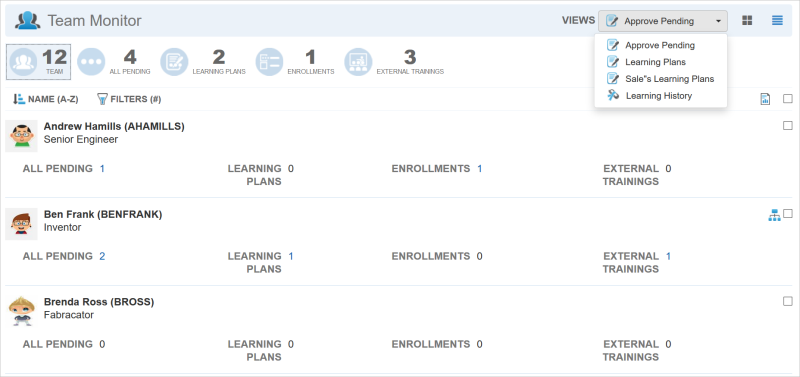
Select the Approve Pending view from the Views drop-down list. (This is available if you select this view during Widget setup. The actual name you defined for this view will display here.) Dashboard metrics display the number of team members with pending events and serve as quick filters. In the example above, there are 12 team members, and 4 of them have pending events waiting to be approved (All Pending). Two team members have Learning Plans pending, 1 has an Enrollment pending, and 3 have External Training events pending. The other quick filters are for a single type of learning event only. Click any of these to display a summary list. Supervisors and Managers can drill down to detail pages by clicking the count links for each User.
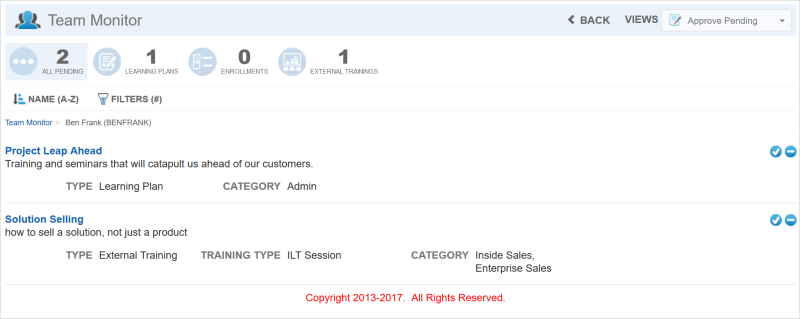
To see complete details for an event, click the event name link.
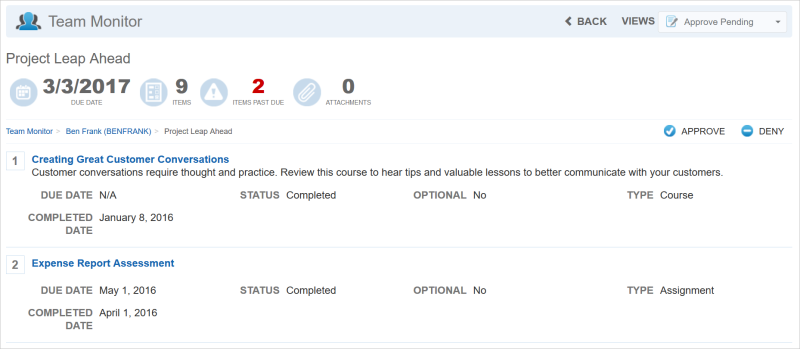
Each pending event can be approved or denied from either the summary list or the detail page. When you click either Approve or Deny, a confirmation window displays.
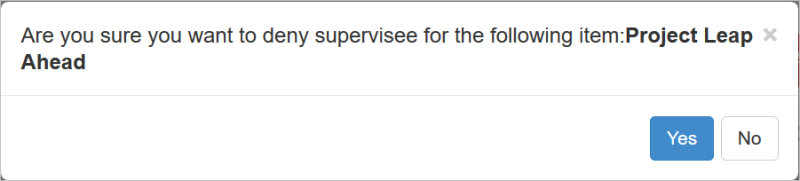
Click either Yes to continue with the action, or No to cancel. For External Training Items, the confirmation window contains a Comments box.
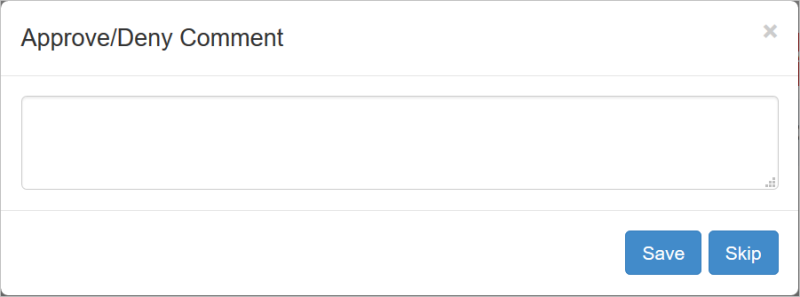
Comments are optional, and you can click Skip to Approve or Deny without entering any comments.
Email messages are sent to Users when events are approved or denied.
The Team Member names listed on the Team Monitor can bee linked to the User Cardsfunctionality. Click the Team Member name to view information about the User.
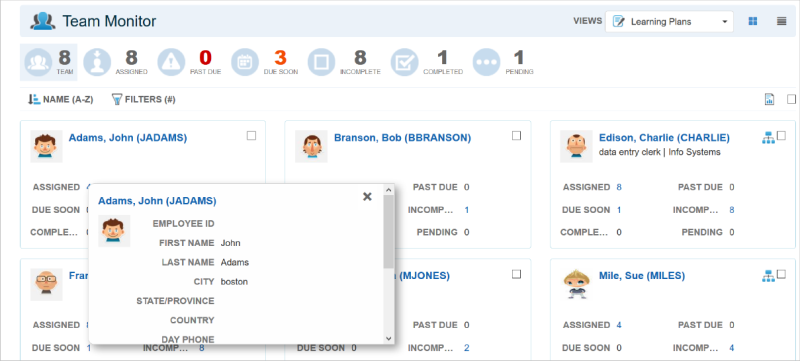
For security reasons, social security numbers are not displayed on the User Cards even if that option is selected to display during setup.
If you made any BI Reports available to Supervisors or Managers, a report icon appears on the Widget.
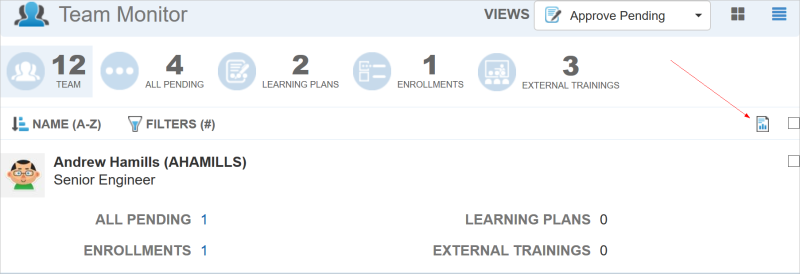
Supervisors can click the icon to open the BI Reporting window.
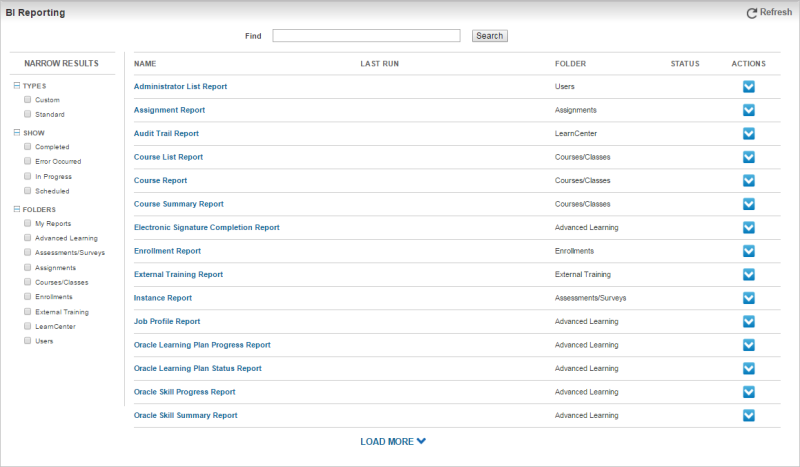
The Reports Window that displays is similar to the BI Reporting Dynamic Object. It opens in a new tab in the browser. To close it, simply close the browser tab.

|
The Export feature is discussed in detail in Adding a Custom Transcript Widget). |

Copyright © 2010-2018, Oracle and/or its affiliates. All rights reserved.
 Related Topics