 icon allows an administrator to edit roster information, not user information. The administrator has to have added additional fields to the roster before this edit functionality is available.
An Enrollment's roster is a list of Users registered for an Enrollment, along with any other standard fields, custom Roster fields, or custom text you want to display. You can add and delete columns, change the text of some columns, and change the position of some columns. While each Enrollment has its own customizable roster, you can set up a default template roster to make new roster creation quicker for yourself or other Admins. You may want to do this if there are certain columns you require on every Roster or that you use frequently. These columns will automatically display on each new roster added in the Taleo Learn. Later when you or another Admin add a roster for a specific Enrollment, you can further customize the Enrollment-specific roster by adding and removing columns as needed. The icon allows an administrator to edit roster information, not user information. The administrator has to have added additional fields to the roster before this edit functionality is available.
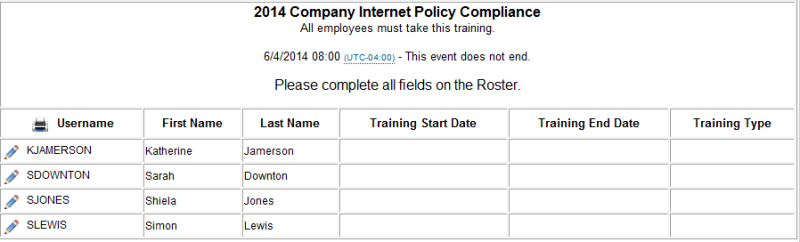
The figure above is an example of a roster. The Username field information is pulled from the LearnCenter database (if this information is populated in the User profile fields.) The Admin also added a custom column header called "Attended?" Custom fields such as these can be populated with data from the actual instructor of the class or the Enrollment Administrator. This can be done prior to or after completion of the class.

|
The following User Permissions are required for this feature:
And the following sub permissions of Manage Enrollments:
Optionally, you may want to grant the following custom Roster field Permissions, sub Permission of Manage Custom Fields:
You will also need to make these fields visible and editable to the appropriate Users on the Field Settings page. See Enrollment User Permissions or instructions on granting and denying User Permissions. |
On the ControlPanel:
 on the Enrollments
menu to expand it.
on the Enrollments
menu to expand it.
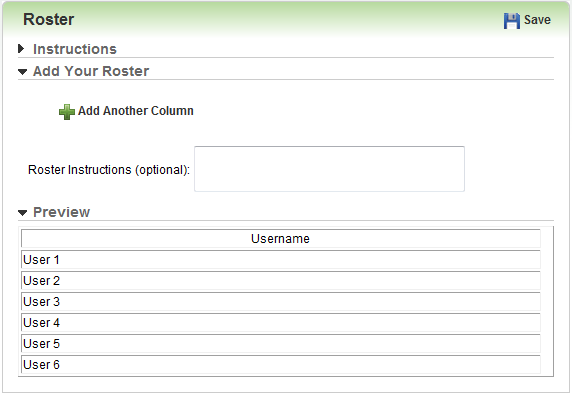
The Roster Editor opens display a default roster setup you can customize. Notice the first column contains the User tag. This represents the Enrollment participants' usernames. When you display the completed Roster, actual usernames will display in this row. You can add more columns to the roster, and the data for these columns can come from standard fields (they will automatically pull User information stored within LearnCenter) custom fields, or custom Roster fields. You can also set up default roster instructions that will automatically appear on every new Enrollment roster.
|
|
You can set LearnCenter to display a Roster link on the Enrollment Information pop-up window after Users self-enroll. This functionality is set using the following Registry Key: Show_Roster_Link. Set the Value to 1 if you want to activate this functionality. You can set LearnCenter so that the roster automatically pops up after Users self-enroll. (If you also enable Show_Roster_Link, the link will display on the Enrollment Information and the Roster will pop up.) This functionality is set using the following Registry Key: Show_Roster_After_Enroll. Set the Value to 1 if you want to activate this functionality. See Registry Editor for instructions on setting Registry Keys. |
To add columns to your roster:
|
|
You can set LearnCenter to perform a close match search against standard LearnCenter data fields to automatically populate the Roster fields. This functionality is set using the following registry key: Perform_Close_Match_On_Roster_Fields. Set the Value to 1 if you want to activate this functionality. See Registry Editor for instructions on setting Registry Keys. |
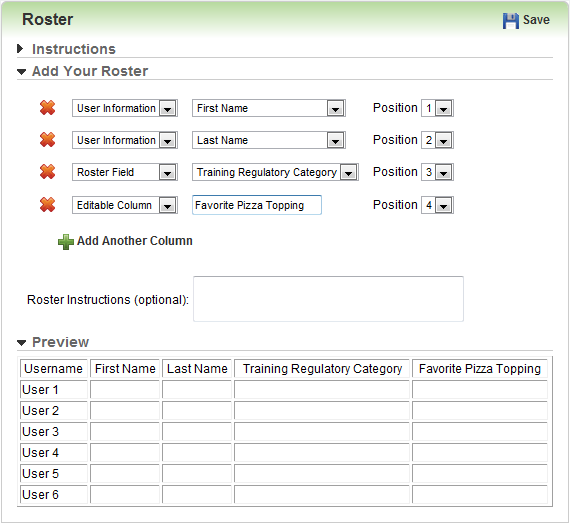
If you need to change the order of your columns change the number in the Move To drop-down list. For example, if you want to change column 4 to be column 2, select 2 from the Move To drop-down list.

Copyright © 2010-2018, Oracle and/or its affiliates. All rights reserved.
 Related Topics