The Catalog Widget enables you to present a catalog of learning events for Users. Catalog Widgets are based on previously set up Search Widgets. If you have not already created a Search Widget, you will need to do so before you can create a Catalog Widget.
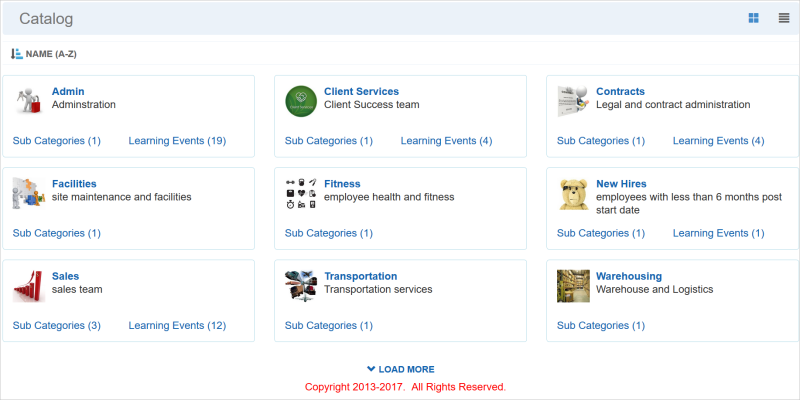
The Catalog Widget groups training by Category. Users can search for training by root Categories, and then drill down through the sub category hierarchy to find available Learning events. Notice there are three links on each Catalog item:
Notice in the illustration above that each Category has an image. Images can be added to Categories when you add or edit them under the Categories Control Panel menu. You can also set up a default image to be used for all Categories.
You can create Catalogs for a single type of learning event or a combination of event types. You do this during the Widget setup by choosing a Search Widget that is already set up to search for only these learning event types. Learning event types available for cataloging include:
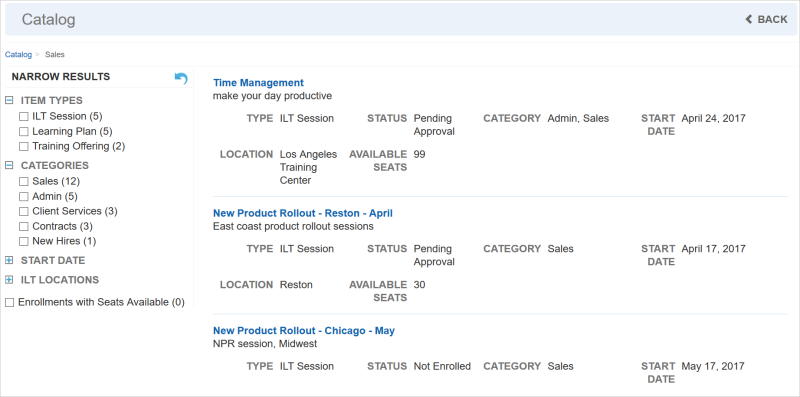
As with other Widgets, The Catalog Widget can display the Catalog in either Card View or List View. You can also sort by Name, or use Filters. When Users click the Learning Events link, or drill down to learning events in sub Categories, a Search Results page displays the available learning events, along with facets on the left side of the page to refine the results.
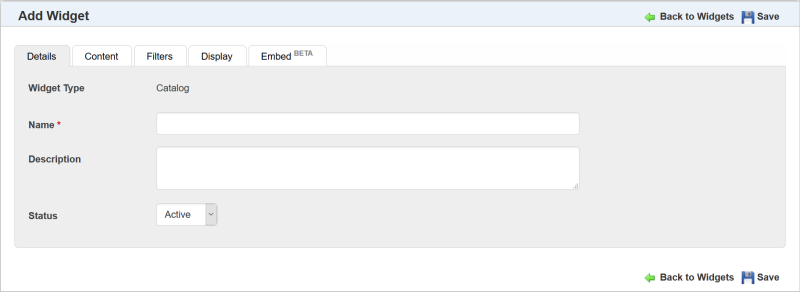
You can add a new Catalog Widget from the Widgets page. On the Control Panel:
 on the LearnCenter Design
menu to expand it.
on the LearnCenter Design
menu to expand it.
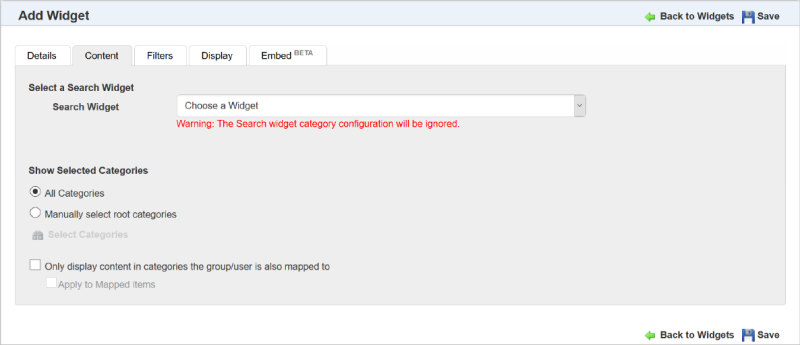
Select a Search Widget from the drop-down list. These are Search Widgets you have already created. If you have not already created Search Widgets, there will be nothing to choose from here.

|
Note the warning message stating that the Search Widget’s list of Categories will be ignored. This is because you will be determining which Categories you want to use for the Catalog Widget. |
For Show Selected Categories, select either:
|
|
You can only select root Categories here. Users will be able to drill down to look through sub Categories on the Widget. |

|
WARNING: Selecting this check box makes your selection implicit, and inheritance from root or parent Categories does not apply. Users and items must be mapped to the exact same Category or sub Category in order for the items to display to Users on the Widget. |
Select the Apply to Mapped Items check box to filter even further by only displaying the items within containers (Learning Plans, Enrollments, and Training Offerings) that are also mapped to the same Category as the User. What this means is that everything mapped to a container such as a Learning Plan (Courses, Enrollments, etc.) must also be mapped to the same Category as the User in order for the User to see it on the Widget.
|
|
USE CAUTION: Be sure to inspect the learning items that are mapped to Learning Plans to ensure that they are also mapped to the same Category as the Learning Plan and the Users. If required Learning Plan mapped items are not mapped to the same Category as the Learning Plan Users, then Users will not be able to complete the Learning Plans, because they will not have access to all of the Learning Plan’s required learning items. |
For example if this check box is selected and:
Learning Plan ABC is mapped to the New Users Category
John Smith cannot complete Learning Plan ABC, because Course 2 does not display to him on the Widget.

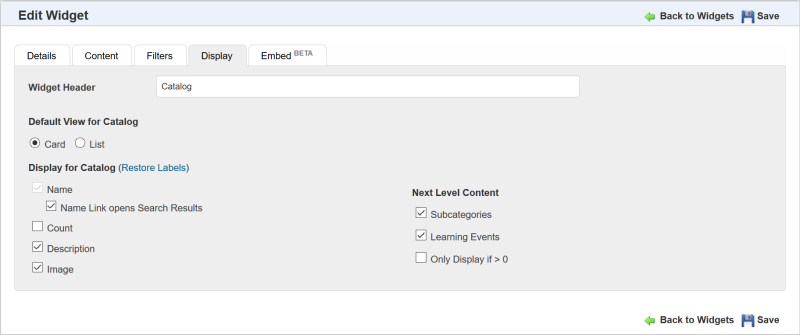
Use the Display tab to indicate what elements will display to Users on the Widget.
 . A field displays and you can type something else for the label. If you want to return the label to the original default text, click Restore Label. Click the check icon to accept the change, or click the x icon to start over. You cannot change the label for Name and Description.
Depending on the setup, Users might see the Catalog Widget like any of the following illustrations.
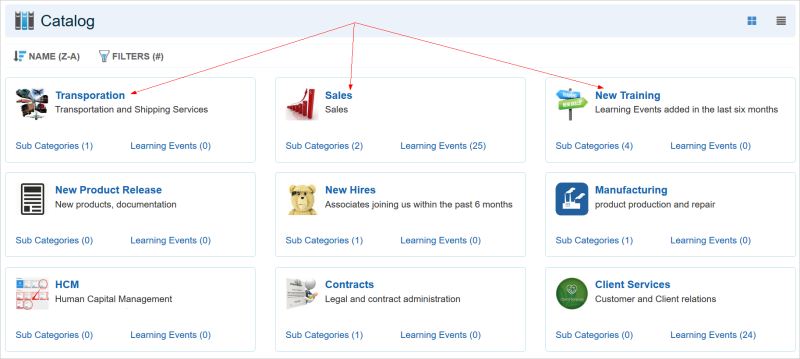
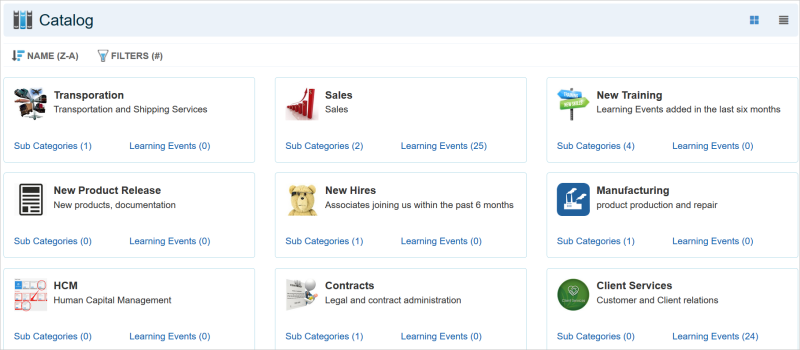
In the example above, the Catalog setup includes Category images and hyperlinks for Category Names. The following image displays a Catalog that has the Name Link opens Search Results check box on the Catalog Widget setup Display tab cleared.
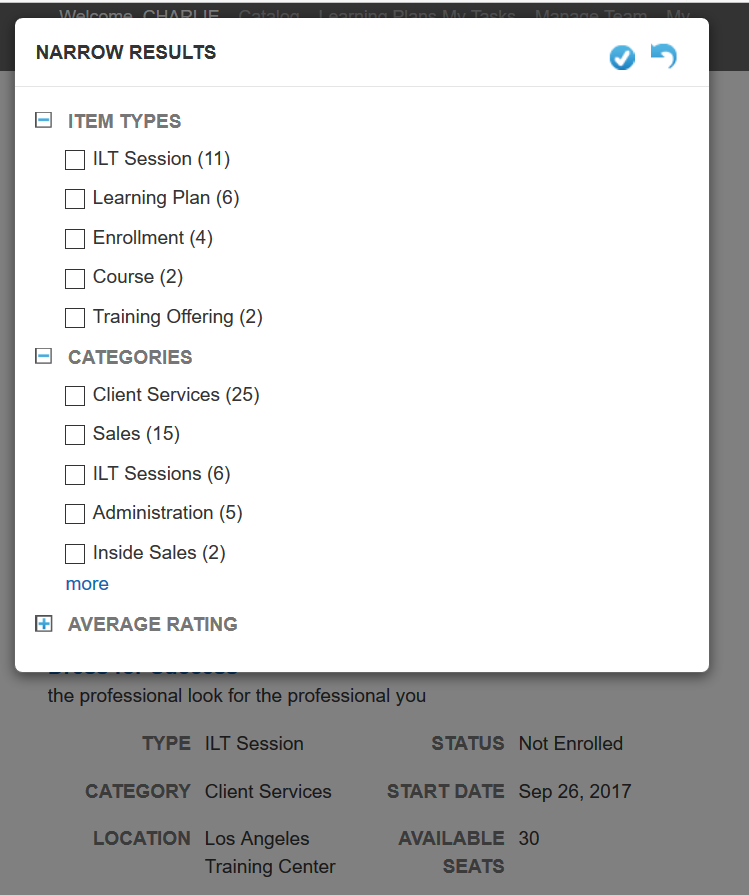
The following is an example of how the Catalog Widget displays on to smaller platforms. Notice that a filter icon appears when the display screen is too small to include the facets section of the Catalog.
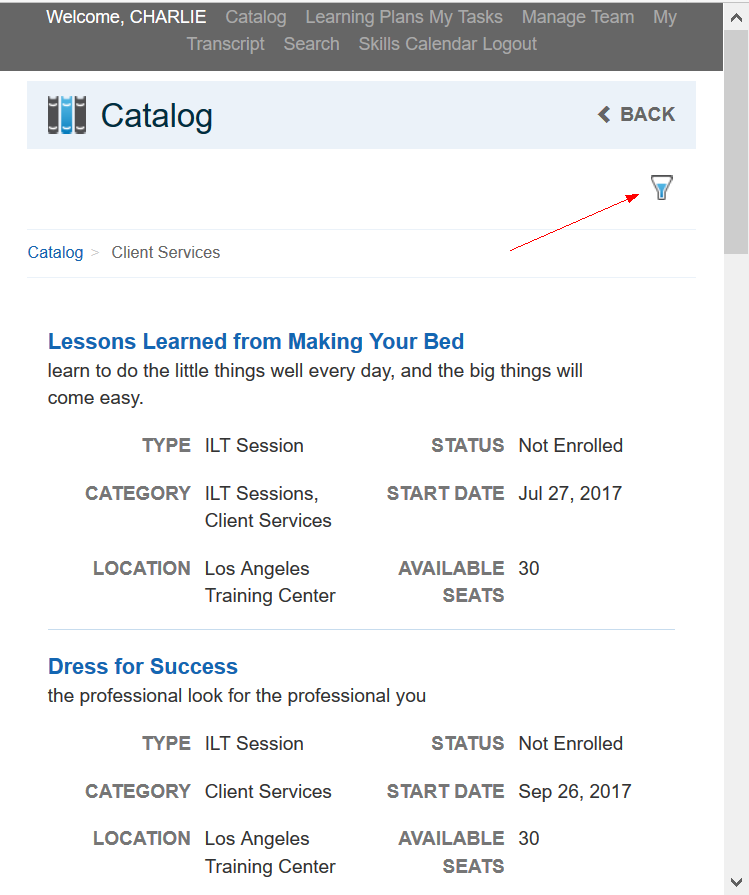
When Users click the icon, the facets display on top of the results page.

Copyright © 2010-2018, Oracle and/or its affiliates. All rights reserved.
 Related Topics