 on the LearnCenter Design
menu to expand it.
on the LearnCenter Design
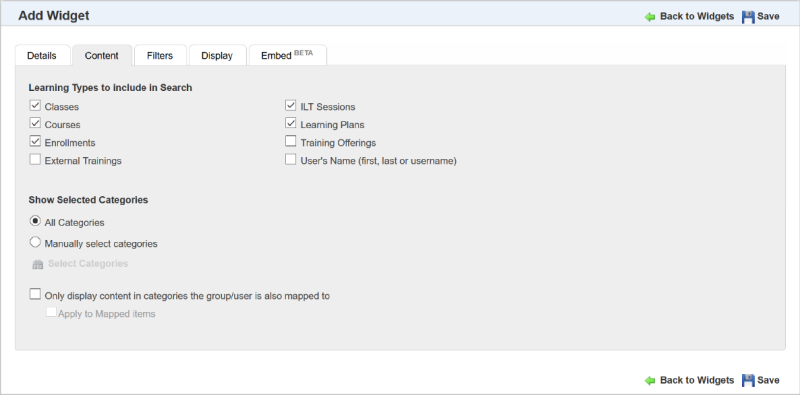
menu to expand it.Using a customizable Search Widget, Users can quickly find available training along with the delivery options. Users can search for, and quickly find their Courses, Classes, Learning Plans, ILT Sessions, Enrollments, Training Offerings, External Training, and other LearnCenter Users. On the Control Panel:
on the LearnCenter Design
menu to expand it.

Type a Name for the Widget.

|
You can restrict Widgets for certain audiences by using Access Filters. See Access Filters for information. |

|
WARNING: Selecting this check box makes your selection implicit, and inheritance from root or parent Categories does not apply. Users and items must be mapped to the exact same Category or sub Category in order for the items to display to Users on the Widget. |
Select the Apply to Mapped Items check box to filter even further by only displaying the items within containers (Learning Plans, Enrollments, and Training Offerings) that are also mapped to the same Category as the User. What this means is that everything mapped to a container such as a Learning Plan (Courses, Enrollments, etc.) must also be mapped to the same Category as the User in order for the User to see it on the Widget.
|
|
USE CAUTION: Be sure to inspect the learning items that are mapped to Learning Plans to ensure that they are also mapped to the same Category as the Learning Plan and the Users. If required Learning Plan mapped items are not mapped to the same Category as the Learning Plan Users, then Users will not be able to complete the Learning Plans, because they will not have access to all of the Learning Plan’s required learning items. |
For example if this check box is selected and:
Learning Plan ABC is mapped to the New Users Category
John Smith cannot complete Learning Plan ABC, because Course 2 does not display to him on the Widget.
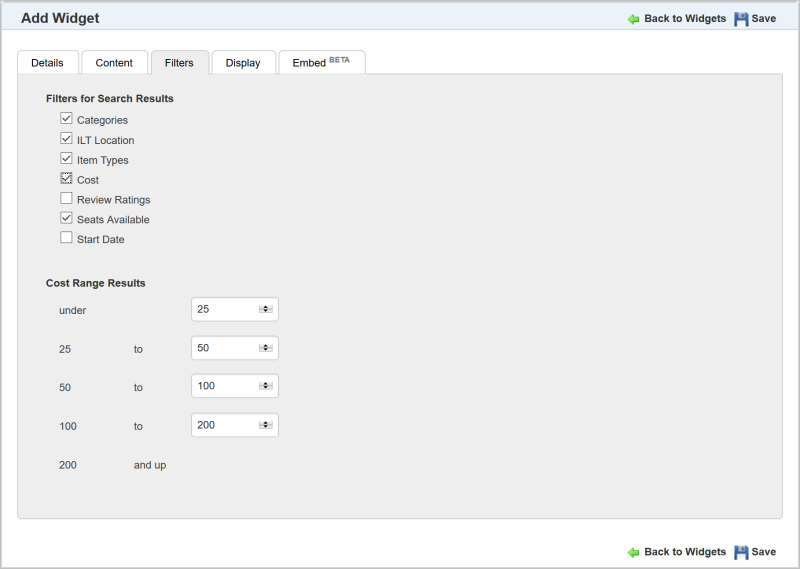
Use this tab to indicate which facets should appear on the search results page.

 . A field displays and you can type something else for the label. If you want to return the label to the original default text, click Restore Label. Click the check icon to accept the change, or click the x icon to start over. You cannot change the label for Name.
Select the Supervisor Assigns Enrollments check box to allow Supervisors to assign Enrollments to their direct reports. Select the Include Indirect Reports check box to allow Supervisors to assign Enrollments to their indirect reports.
The following illustrations are examples of how this Widget displays to Users based on what the Admin selected in the Widget setup. Initially, all Users see the Search field and the Advanced Search button (if the Admin elected to show this during setup.)

A minimum of 2 characters is required to search. A wild card is assumed at the end of each word or phrase unless you use quotes (“ “) around each search string. Quotes return exact matches.Using Advanced Search. (See "How to Search for Keywords" below for additional search instructions.)
Users can click Advanced Search to display the Advanced Search window. This window makes it easy to do Boolean-style searches.
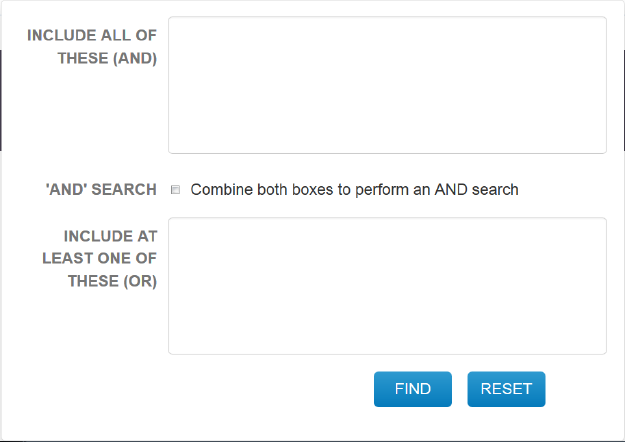
Everything you type in Include All of These (AND) is considered required. All words you type in this box should be separated with a space. Each space is considered as “And”.
Everything you type in Include At Least One Of These (Or) is considered an “Or” phrase. All words you type in this box should be separated with a space. Each space is considered as “Or”.
You can connect the two statements (fields) by selecting the ‘And Search’ check box. This means it will search for everything in the top box AND everything in the bottom box. (If you are familiar with Boolean search methodology, this field is the equivalent of surrounding the items in the keyword search field with parenthesis.)
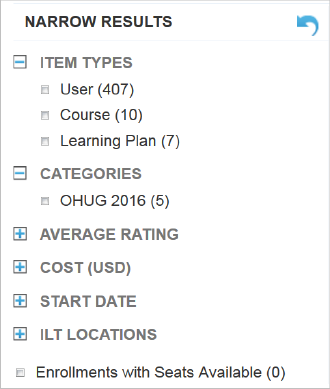
A logical set of facets is provided with the search results so that Users can filter them efficiently.
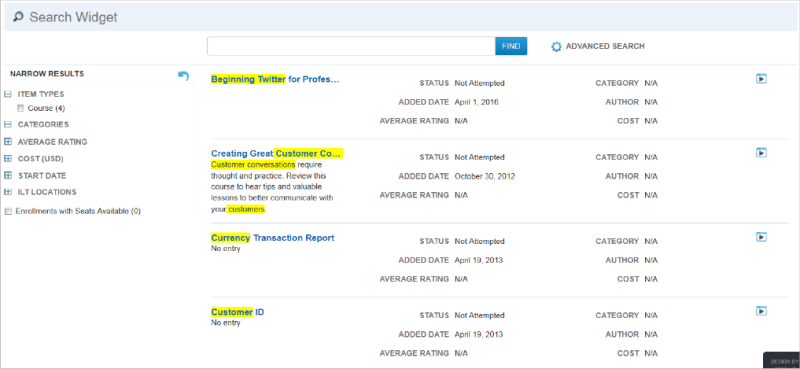
Notice in the example above that search terms found are highlighted. Use of highlighting can be controlled during the Widget setup. Users can click the item title to view details, or click the launch icon on the right side of the results to open and begin an item. Search results can be narrowed using the facets that appear on the left side of the page. Selecting multiple facets further narrows results, and selecting fewer facets widens the search results. You can clear all selected facets and start over by clicking  .
.
Selecting a facet check box includes its related items in the search results. For each selected Item Types or Categories check box, the page refreshes, and the results are cumulative. For example, a User might want to only include search results that are Learning Plans and Enrollments. Selecting the Learning Plans and Enrollments check boxes displays only Learning Plans and Enrollments in the search results. Users can narrow the results by:

|
LearnCenter places items in a cost range facet when they are over the minimum, and equal to or less than maximum. For example, if the cost ranges are 25-50; 50-100, and an item costs 50, it is included in the 25 to 50 facet, not the 50 to 100 facet. |
Users can further narrow the results by selecting the Enrollments with Seats Available check box. Selecting this item displays only those Enrollments that have seats remaining.
Users can search for keywords in several ways.
Advanced search terms can be used in combination with one another. For example: “mandatory for comp*“ NOT Supervisors OR “Level1 Welders”.
Users can use parenthesis to group terms. For example: Compliance AND (Ethics OR Harassment). LearnCenter will retrieve results having the terms "Compliance" and "Ethics", as well as items with "Compliance" and "Harassment".
|
|
Search is not case sensitive. The Search operators AND, OR and NOT must be in English for this first phase of the Search feature. The Search field is limited to 100 characters. For all other keywords, you can search using any supported language. The search term must be found in the item for the item be returned. When using the search operators AND and NOT, tests are performed against each part of a result (i.e. name, description, standard and custom fields) to see if they meet the search criteria entered. If each part of a result passes the test, the result will be included or excluded based on the operator used. If one part of the result fails the test to match the search criteria, then a User may see results they would not expect to see. |
The Search index includes an item’s name,description, all custom fields, and certain standard fields (see the table below for specifics). Search results with matches in name and description will rank higher in the results than those without name or description matches. It is possible for an item to be returned in the search results, but not have any highlighted terms, because the match was on an attribute or element that isn't displayed in the search result description.
Relevancy ranking is determined based on where the search term is found:
The results will include items made available in the Global Search functionality. (See Global Search for details about this existing feature.)
Users will initially see the sort order you determined in the Widget setup.
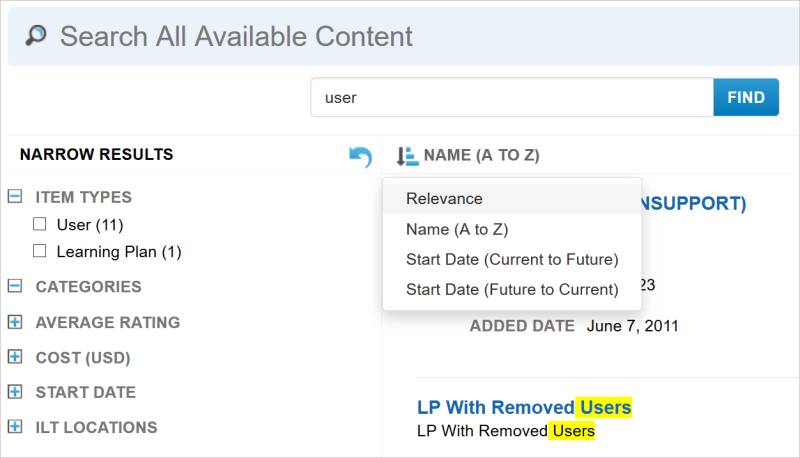
They can also change the sort order to use any of the new sort orders.
If you enabled Supervisor Assignment options on the Display tab of the Widget setup, an icon displays to only Supervisors on the Widget.
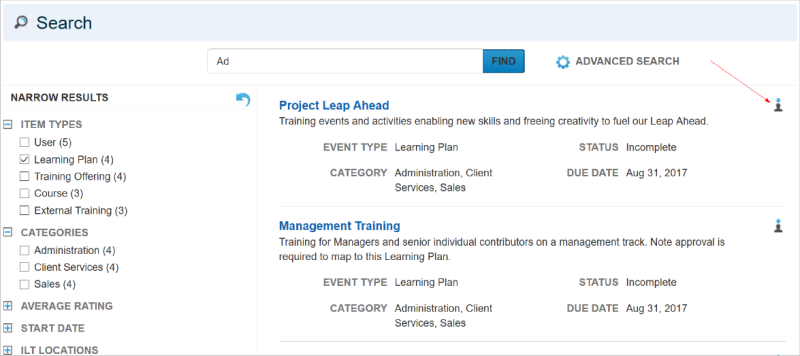
Supervisors can use it to assign Learning Plans and Enrollments to direct and indirect reports (depending on which of these options you enabled). When a Supervisor selects the icon, the following window opens.
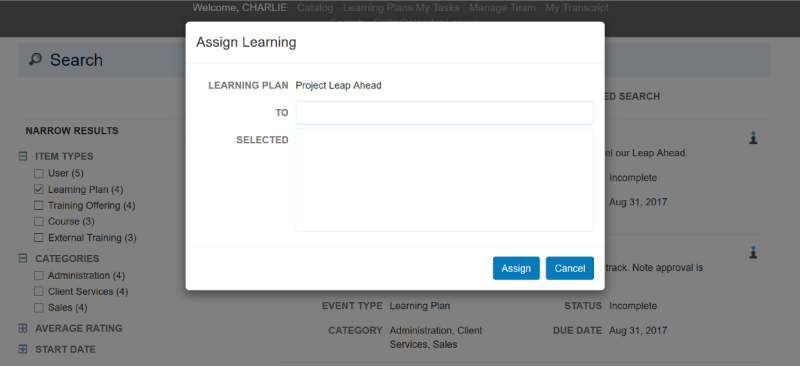
They can begin typing the name of the User they want in the To field. Matching team member names appear after just few letters. The only names available for selection are the current Supervisor’s own team members and any indirect reports (if you selected the Include Indirect Reports option on the Display tab of the Widget setup). Once selected, the name appears in the Selected field.
|
|
The formatting of the name in this list is dependent on what is selected for the Name Display Order field in Configuration Options > Localization Settings. |
Click Assign. A confirmation message appears at the top of the page.
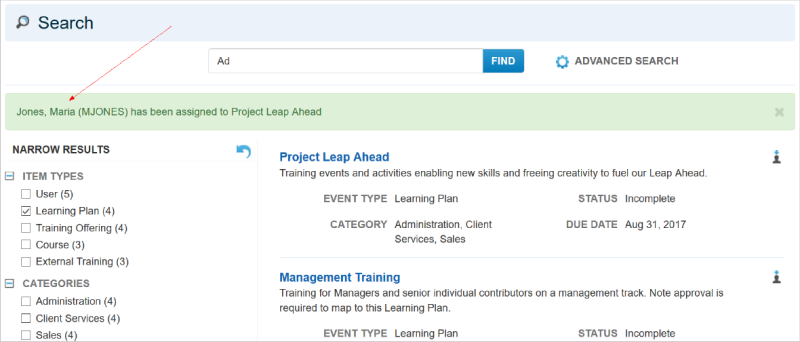
Once assigned, any Communication Messages already set up for Learning Plans and Enrollments will be sent to newly assigned Users.
If your LearnCenter is configured to display User Cards, any time you click a User’s name in the Search Widget’s search results, that User’s User Card displays.
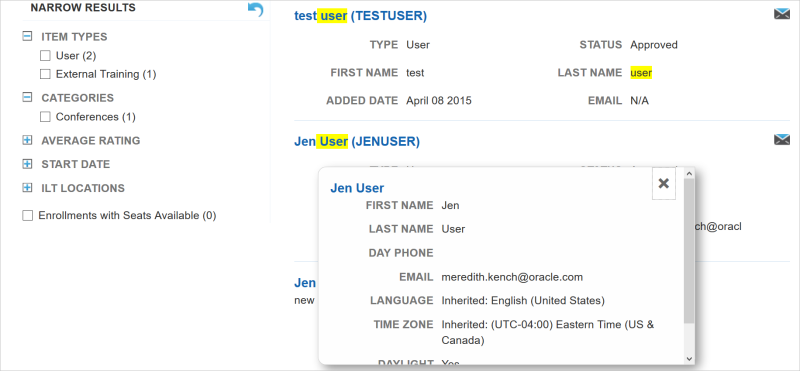
Click the X to close the Users Card.
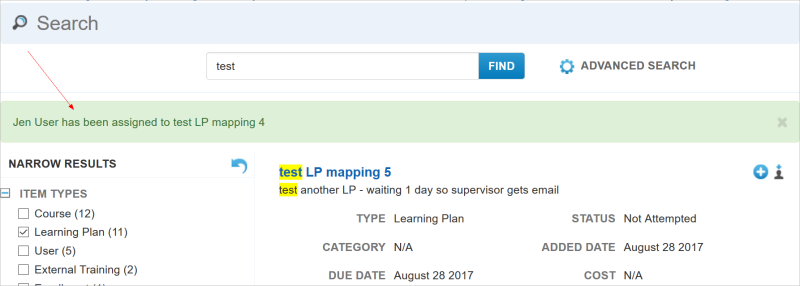
When Supervisors assign Enrollments from the Search results, LearnCenter checks to see whether a User has completed required Prerequisites. If Users have completed an Enrollment’s Prerequisites, they can be assigned to it. A confirmation message displays to let the Supervisor know that they were assigned.
If Users have not met the Prerequisites, their Supervisors see an error message stating that they were not assigned to the Enrollment.
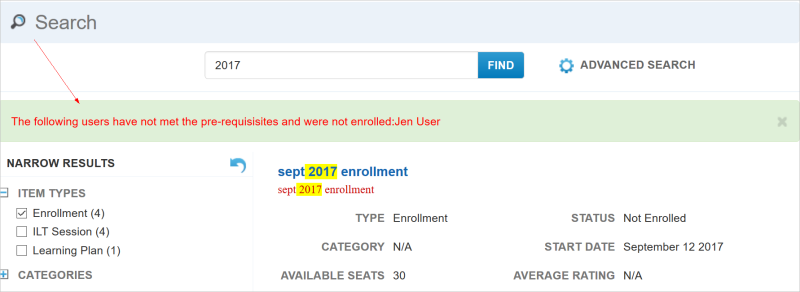
Both messages can be closed by clicking the X.

Copyright © 2010-2018, Oracle and/or its affiliates. All rights reserved.
 Related Topics