
You can make Courses sellable products for LearnCenter eCommerce. Once you indicate which Courses are products, they are added to the product catalog list.
When a User purchases a Course using eCommerce, the Date Started and Last Viewed Date are set to the date and time of purchase on the Course Started Dynamic Object. Purchased Courses are listed on a User's My Task Widget with a completion percentage of 0% until the User starts the Course. The Start Date initially displays the date of purchase until the User starts the Course.
|
|
Important: Adding eCommerce products requires that you set a currency under eCommerce settings. You do not have to keep eCommerce enabled after you've selected a currency, but you do need to enable it to select a currency. |
On the ControlPanel:
 on the eCommerce
menu to expand it.
on the eCommerce
menu to expand it.

|
If the Source Control feature is Active for your LearnCenter, only current and published Classes appear in the Select Courses window. See Learning Object Manager for information about the Source Control feature. |
The Courses Created filter contains three choices. Click the one that applies:
The Courses Location filter contains three choices. Select the check boxes of all the filter choices you want to include:
The Course Titles filter contains two options for filtering with text strings:
The Courses in this Skill/Category filter contains two options:
|
|
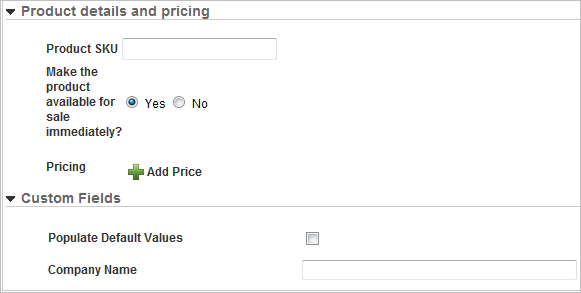
The Custom Fields section displays with the custom fields you added . Any value you add to the custom fields display in the eCommerce Order Message if you selected this option in Custom Field Settings. See Custom Field Settings and Field Settings for additional information. |
If you want to add an additional price point for the product, click Add Price and repeat the previous steps.

Copyright © 2010-2018, Oracle and/or its affiliates. All rights reserved.
 Related Topics